Belgian-Style Witbier: KEGGED!

I had the time on Wednesday (2 Mar 2011) to keg my Witbier, so I hustled up the equipment, sanitized it, and kegged that baby … Here are a couple of pictures of the “transfer process.”  You can see some suds in the 3rd picture — that’s my sanitizer residue …

It really cleared up well … of course, it’s been in secondary fermentation since early February (February 10th).  So, from 23 Jan until 2 Mar in the fermentor — 38 days in the fermentor … at a temp of approx 68 degrees.  You can see the final gravity in this picture:

With correction … I read a F.G. of 1.010 at 68 degrees … that corrects to 1.010.  So, with the O.G. of 1.051, I ended up with about 5.3% ABV.  My mash efficiency was around 72% … I may have mashed too quickly.  The attenuation was about 63% … may have had something to do with my yeast age.

You can see my CO2 cartridge here — it is a 20 oz paintball tank — works great!  I’ve got two that I swap out, but they both last a long time.  You can see in the 3rd picture that I’ve got the pressure kicked up and am force carbonating it in the fridge.  I just had a sample today–it is carbonated nicely … I’ll probably leave it at that pressure for another day or so and then move it down.  I’ll post a couple of final beer photos.  And, as usual, there’s always some clean up to do!

Enjoy,

Beer Mentor

Belgian-Style Witbier: Racking to Secondary

I finally racked my Belgian-style Witbier to the secondary fermentation “tank.”   I left it in primary fermentation for 15 days … seems a little long, but it kept being active.  I think the temperature stayed between 68 and 70 degrees pretty much the entire time (except when we lost electricity and the temp in the house dropped to 54 degrees … then it was a little cooler! <smile>).

The first thing I did was prep and sanitize the equipment.

You’ll notice that I use a “Better Bottle” as my secondary fermentation “tank.”  I typically use the “bucket” for primary fermentation because it always makes it easy to transfer (and clean up).  You can see that in these pictures — you can definitely see what I have to clean!

I thought the color was right on … of course there’s still some fermentables (and other stuff) suspended in the pre-beer … it will clear over time … but check out the color here.

Also, you can see that the Specific Gravity is 1.024 (approx).  My target Final Gravity is 1.010 … again, I think I have some suspended particles that give it a little higher gravity; however, it was still bubbling away after I transferred it.  Of course, you always want to tast the intermediate “beer”–it was delicious.  I can’t wait for the final product!

Beer Mentor

New Brewery: Port City Brewing Company

This Friday I was fortunate enough to attend the Open House for the newest Production Brewery in the DC area: Port City Brewing.  Actually, I had the day off Friday, I was looking for something to do–a friend of mine had mentioned there was a new brewery opening in Alexandria but he couldn’t remember the name.  Google here I come! I saw this article about it in the Washington Post and thought I could pick up a Growler around lunch (I thought they were already open)–The article mentions that their Belgian Wit would be available — and since I’m currently brewing a wit bier I thought it would be a great opportunity.

I showed up around noon and they were obviously not open.  I was able to poke my head in the back and (fortunately) one of the brewers told me their open house was at 4pm.

I showed back up at 4pm and, sure enough, they were open!

They had two of their four flagship beers available for tasting (see picture above).  Here are the images of the four beers:

The beers were quite nice — I even brought home a growler of the Pale Ale.  Yea, refill for $10 baby!  I was impressed with their setup, operation, and the fact that they were very nice (that’s always a plus in my mind around DC!).  The owner gave us a short tour of their brewery.  Here you can see their base grain storage silo and a shot of where it comes out of their grinding room.

They’ve got a very state-of-the-art brewing system.  Here you can see their mash tuns, kettle, and their 30, 60, and 90 barrel fermentors.

These tanks in the below pictures are their staging vessels for kegging and (soon) bottling.  Just to the left of the tanks you can see their cold storage facility.  Since their beer is not pasteurized it needs to be kept cool.   These tanks will also be used (eventually) for lagering.

They are nearly ready to begin bottling–here’s a shot of their bottling equipment.  An interesting anecdote that may actually interest only me:  they picked up this bottling equipment second-hand from the Southern Tier Brewing company.  That’s another plus in my mind — I love those Southern Tier guys!

Finally, I overheard that their witbier is already on tap at Churchkey.  They have it at a few other spots–but I don’t remember where.  Their WitBier and Pale Ale are ready now.  The Porter is next with the IPA following close on their heels in a couple of weeks!  I can’t wait!  Welcome to the DC area, Port City Brewing!

Beer Mentor


“Improve Your Wit” Bier: Primary Fermentation

All,

Just in case you were wondering if my yeast starter/brew session kicked off “OK” see the photo of my “airlock.”  It went so big that it “Krausen”ed right into the Airlock!

What’s even more interesting is that I put it in the warmest place in my house, and the temp is still holding steady at 68 degrees … yeah, it’s been a little cold around here.

Should be transferring to secondary in the next few days!

Beer Mentor

Brew Day: “Improve Your Wit” Beer

My friend, Brian, came over today and joined in a little brewing and beer drinking.  It was time to put all the pieces together and get the first brew of the year done.  These first few pictures are of the initial preparation: equipment set up, measuring and note taking–making sure I have it set in my mind how and when to get things done.

For those interested, here is a list of the ingredients and a general rundown of my recipe:

This is a modified recipe (aren’t they all!) that I’ve used a couple of times–I wanted a WitBier this time to help me make it through the cold and think about summer.

Ingredients: 1) 4 Lbs American 2-Row, 6 Lbs White Wheat Malt, 0.75 oz Goldings (60 minutes), 0.25 oz Goldings (5 minutes), 1 oz Orange Peel (dried)+0.5 oz Coriander seeds+0.5 oz Chamomile (5 minutes).  The yeast was one I captured from a previous WitBier that I “resuscitated” from a Saison Dupont bottle.   For the truly Beer Geeky, The projections for Style: OG 1.051, FG 1.010, SRM 3.76, 19.4 IBUs, and 5.3% ABV.

Here are some pictures of the mashing and sparging process.  Again, I mashed 10 Lbs of grain with 3.5 gallons of water @ 168 degrees.  It held rock steady in the Mash Tun @ 154 degrees for 90 minutes.  I then sparged with 168 degree water for 45 minutes, ending up with 6 gallons of wort to boil.  Of course I did most of this inside because it was below freezing outside!

Finally, we boiled it all up outside … tossed our ingredients in at the (mostly) appropriate times, and sat back and had a couple of cold ones.  Here’s a few more pictures of the process.  Because it is so cold in my house, I had to keep the primary fermentor up behind my bar.  Oh, we did hit the projected OG pretty much right on the nose–1.052!

One of the brews we sampled came from The Root Cellar in San Marcos, Texas.  Their local “brewery” is called Darkside…this was labeled as a Pilsner with a Belgian Twist.  It was an excellent beer … my only problem was that I’ve held it for over 6 months and it is a bottle conditioned beer–it had plenty of carbonation, but the flavor was great.  I will be stopping back by through there this summer.

I think I see some bubbling in that fermentor already <smile> ….

Enjoy!
Beer Mentor

“Improve Your Wit” Beer: Yeast Starter

Yes!  The Yeast starter is working.  I had a slight temperature problem (my Man Cave is too cold right now).  Once I moved the yeast starter down to my bar area, it started going crazy (see pictures).  I will definitely be ready for the “brewing fest” on Sunday!  Hopefully I won’t have to add any DME to this before Sunday.

Beer Mentor

First Brew of 2011: “Improve your Wit” Beer

In celebration of my friend Ray’s birthday today, I started work on my first brewing project for 2011: A Belgian Witbier.  In his honor, it will be spiced up with Coriander, Bitter Orange Peel, and Chamomile!  The first thing I did was to go to beertools.com and put together (actually modified) a (previous) recipe.  What a great site beertools is!

I had already ordered the ingredients I needed from Northern Brewer.  Those guys are fast and efficient!  Here’s my stash–all I needed was some orange peel and 10 lbs of grain … I already had the hops, coriander, chamomile, and yeast.

Although I already had the yeast, it was in my refrigerator.  I harvested it from a previous brew.  Here’s a shot of my stash and the yeast I picked to use.  This is a 2nd generation sample — I made a Witbier previously, and then a Belgian Session beer, so this yeast is perfect for my style!

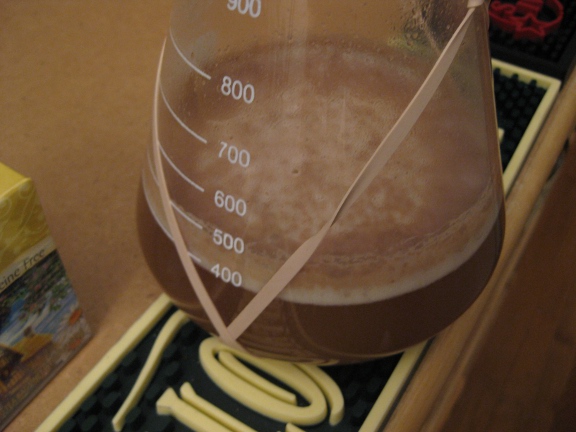
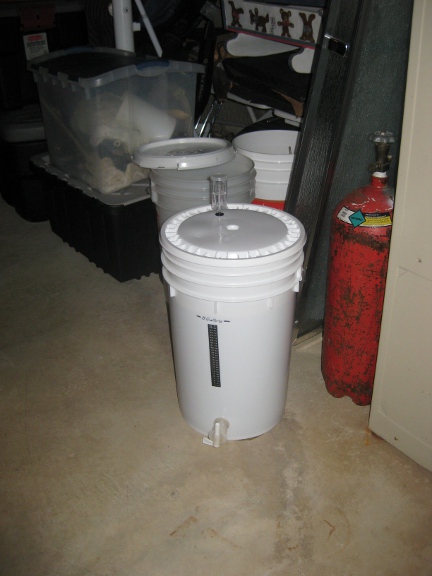
The next part of the process was to get a yeast starter going — I’m brewing on Sunday, so it should be ready by then!  Here are some pictures of the process … first, everything should be sanitary–so, a big bucket of sanitizer (I use Star San).

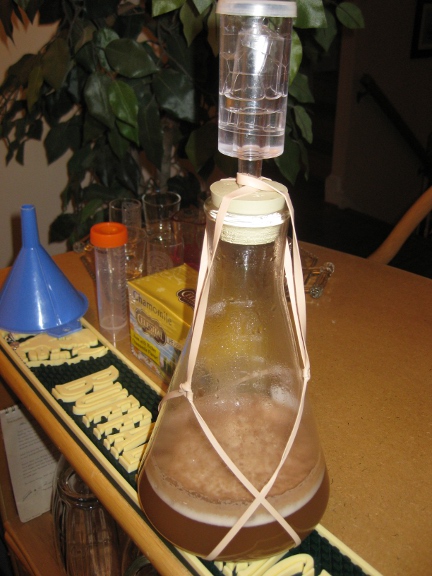
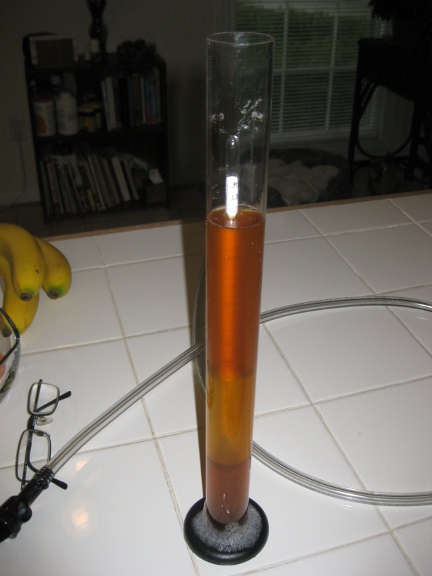
I sanitized my flask and went ahead and pitched my yeast in!

Next, I combined 1/2 cup of Dry Malt Extract with 2 cups of water and boiled it for 10 minutes (to make sure it was sanitized as well!)

While waiting for it to finish, I enjoyed a nice Schneider-Weisse Hefe-Weizen … Yumm!

Next, I chilled my starter in a cold water bath … then put it in with the yeast!

Here it is … ready to begin “fermenting.”  I’m keeping my fingers crossed that this is a still active batch, or I might have to pull another vial … stand by for further updates.

Beer Mentor

Imperial Walker IPA

I’ve had my Imperial Walker IPA on tap now for about 6 weeks … and I’m underwhelmed to say the least.  Don’t get me wrong … this is a good beer … it’s just not great.  I used both my homegrown hops AND the hops I brought back from my visit to Belgium.  I think I picked my homegrown hops to early last year and they just didn’t have the alpha acid to give them the kick I wanted.

This is a balanced (high octane) beer … it just doesn’t have the hops kick I was expecting.  It is actually over 9% ABV … so it is an Imperial … it needed more kick from the hops.  Here are some pictures of the transfer from secondary fermentation to kegging.  Notice the picture that shows the final gravity … yes… I had an excellent mash efficiency (78.2%) and a great attenuation (82.2%) … OG was 1.082 and FG was 1.013.  Wow.

Oh … and check out the “spent hops” picture … I did dry hop this beer … and, although (as I stated earlier) it didn’t come out quite how I wanted it to, the spent hops still looked great!  Great effect … just not great results!  Oh well … it is still a very nice beer when I come home from work!  Next brew: A Wit Bier!

Enjoy,

Beer Mentor

Transferring Imperial Walker IPA to Secondary

Found the time this afternoon to transfer my beer from primary fermentation to secondary.    If you recall, my Original Gravity was 1.081 corrected.  When I transferred it to secondary, the gravity was 1.029 corrected.  So, according to my calculation (via beertools.com) it is sitting at 6.9% ABV right now … I’d like for it to go up a little higher (over 7% would be sweet) but I think the yeast is really stressed.  The higher Final Gravity might make it more of an east coast IPA with a good malt balance.  When I tasted it, I definitely got plenty of hops in the mouth.  I added my 1 oz of Cascade for dry hopping — I’ll probably leave it in secondary for two more weeks and then keg it!  Yes!  It should be good …

1) Here it is waiting for transfer to secondary.  When I popped off the top, you can tell that it was really active — thank goodness for extra room in this bucket!

2) Here’s the next bucket being prepped for secondary.  Since I’m dry hopping, I decided to use a bag to hold the hops and am using a secondary bucket instead of my normal carboy.

3) Here are the hops as I prepare them for secondary fermentation.  I decided to go ahead and dunk them in my sanitation solution on the off chance there might be some wild yeast floating around — oh, and here’s also a picture of some sweet lupulin I lost … darn it.

4) Finally, since I had the time and desire, I decided to capture a few vials of yeast (1056 American Ale) to try and save myself some money.  We’ll see if the alcohol content was too high and suffocated all the remaining yeast.

Beer Mentor

Happy Father’s Day: Imperial Walker IPA!

Today for Father’s day I was able to do two of the things I love.  I got in a nice Mountain Bike ride … and I brewed an IPA!  Because I’m a geek, I named it “Imperial Walker IPA.” Ha!  See the recipe below …)

What is special about this beer is that I used the hops from my garden — so the Nugget and Cascade hops that are in this beer came from my backyard.  Oh, and the Kent Golding hops came from the Hop Farm in Belgium I visited last November.  Here’s hoping that it turns out well.  I’m also including some pictures of the brew day today.  If Star Wars decides to sue me over the name, I can always change it to “Imperial Stumbler IPA” to match my other nickname … stumblingpiper.  Ha ha!

From the initial specific gravity measurement, I think I pegged my 1.079 OG.  Here’s hoping it starts bubbling tonight …

Beer Mentor

Imperial Walker IPA
--------------------------------------------------------------------------

General
--------------------------------------------------------------------------
                    Category: India Pale Ale (IPA)
                 Subcategory: American IPA
                 Recipe Type: All Grain
                  Batch Size: 5 gal.
               Volume Boiled: 6 gal.
             Mash Efficiency: 75.0 %
         Total Grain/Extract: 15.00 lbs.
                  Total Hops: 3.6 oz.
       Calories (12 fl. oz.): 313.6
                Cost to Brew: $51.55 (USD)
Cost per Bottle (12 fl. oz.): $0.97 (USD)

Ingredients
--------------------------------------------------------------------------
           13 lbs. 2-Row Brewers Malt
            1 lbs. Munich Malt
            1 lbs. American Caramel 60°L
          1.25 oz. Nugget (Whole, 13 %AA) boiled 60 minutes.
             1 oz. Goldings (Pellets, 5 %AA) boiled 15 minutes.
           0.5 oz. Goldings (Pellets, 5 %AA) boiled 3 minutes.
          0.35 oz. Cascade (Whole, 5.5 %AA) boiled 3 minutes.
           0.5 oz. Simcoe (Pellets, 11.9 %AA) boiled 60 minutes.
             1 oz. Cascade (Whole, 5.50 %AA) added to Secondary.
            Yeast: WYeast 1056 American Ale

Notes
--------------------------------------------------------------------------


Vital Statistics
--------------------------------------------------------------------------
  Original Gravity: 1.079
  Terminal Gravity: 1.016
             Color: 13.72 SRM
        Bitterness: 100.8 IBU
 Alcohol (%volume): 8.3 %

--
Results prepared by BeerTools.com
http://www.beertools.com/