One of the things I’ve tried to do in recent years is to recapture and harvest yeast from the beers I’ve been brewing. Even one pack of dried yeast is $6 bucks! If you go with some of the specialty yeasts (liquid/what not) you are looking at $12 to $15 a package. With 9 brewing sessions this year, that would add up to about $100. I’ve worked really hard on capturing and storing the yeasts I use the most often. Here’s a picture of those in my beer fridge:
You’ll see I have one vial of “Brettanomyces Bruxellensis” from White Labs. The rest of the vials are all recaptures. I’ve got WLP 550, WLP 565, Hornindal Kveik, a few misc Orval (Brett Bs). I still have some dry yeasts packets as well.
Knock on wood, so far I’ve had great luck by re-pitching a starter (2 cups water, 1/2 cup DME) about 2 to 3 days ahead of brew day. I usually check my yeast health and do some random cell counting.
If it’s a big brew, I’ll do a bigger starter. I have a couple of 1 liter, a 2 liter, and a 5 liter flask if I need them! I had built a laminar flow hood, but I “gifted” it to a local brewery while I was living in Tucson (hopefully they are still using it). I would like to do some yeast culturing, so I’m probably going to have to build a new one — I’d like to build a smaller version — I’ll just have to figure out the noise reduction/venting issues in my “brewery.”
One of my goals over the next couple of years is to try and capture a local yeast (from one of the many fruit orchards near here) and see if I can make a passable beer from all British Columbia ingredients. The Gambrinus Malt house is about an hour north of me. I can get locally grown hops — I just need the yeast! I’ll keep my fingers crossed that I can capture some and it doesn’t smell like dirty socks. Stay tuned for more of this adventure!
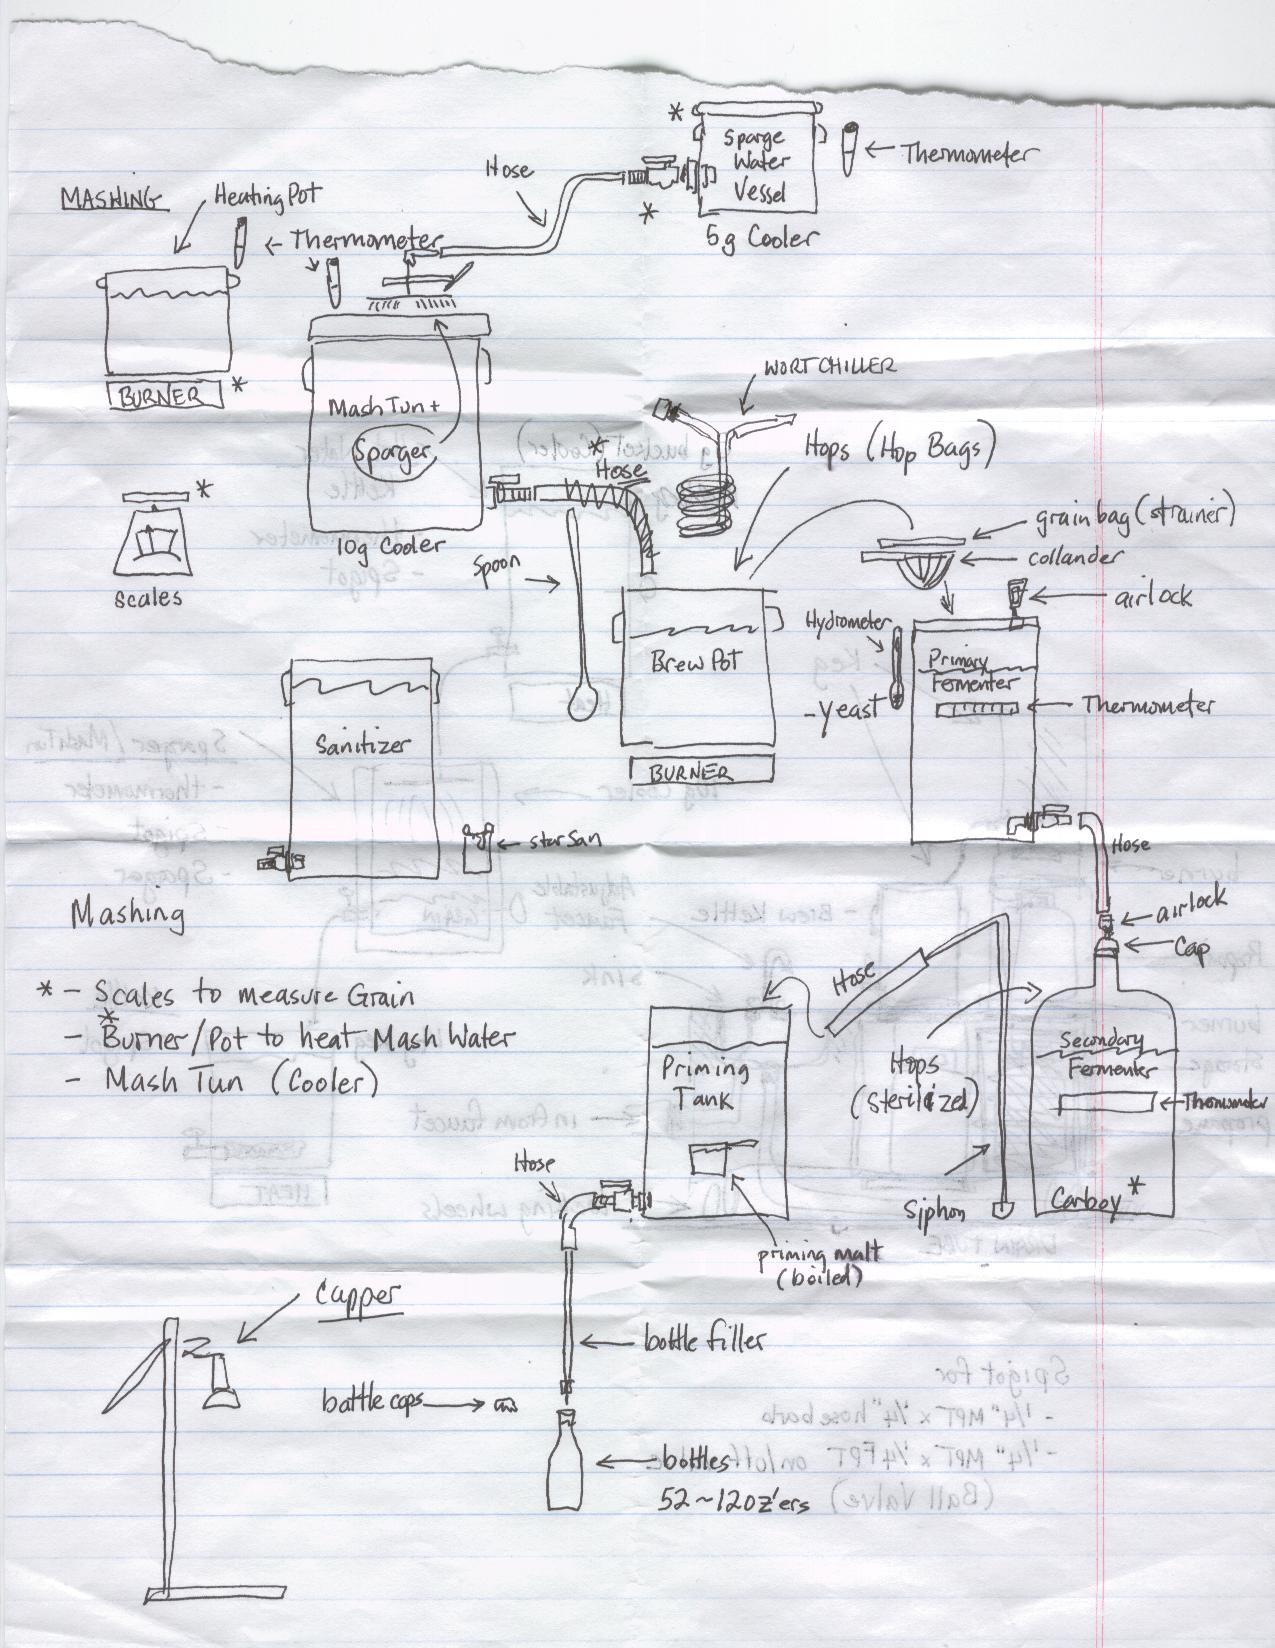
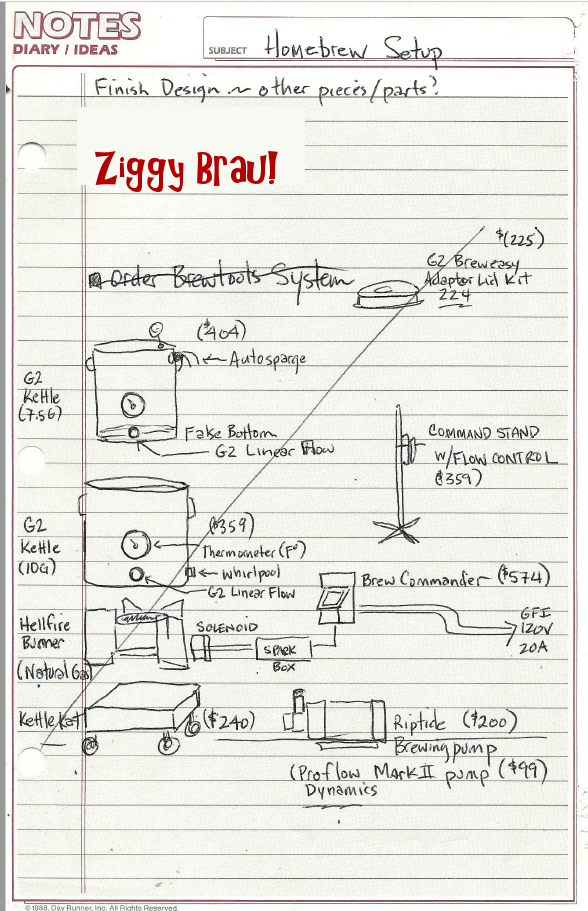
After 20+ years of using a hodgepodge of brewing equipment — albeit it worked (mostly) well — I decided to invest in a new “brewery” for myself this year. Actually, I had a design in place for my brewery since 2002+ … here are a few drawings I’ve done through the years representing what I wanted. The first two images were my original design … some time later I did the next two drawings. The final drawing was a recent design for my brewery based upon all Blichmann equipment. I was trying to incorporate it with my existing Blichmann equipment — that’s the reason I didn’t just go with a Breweasy system.
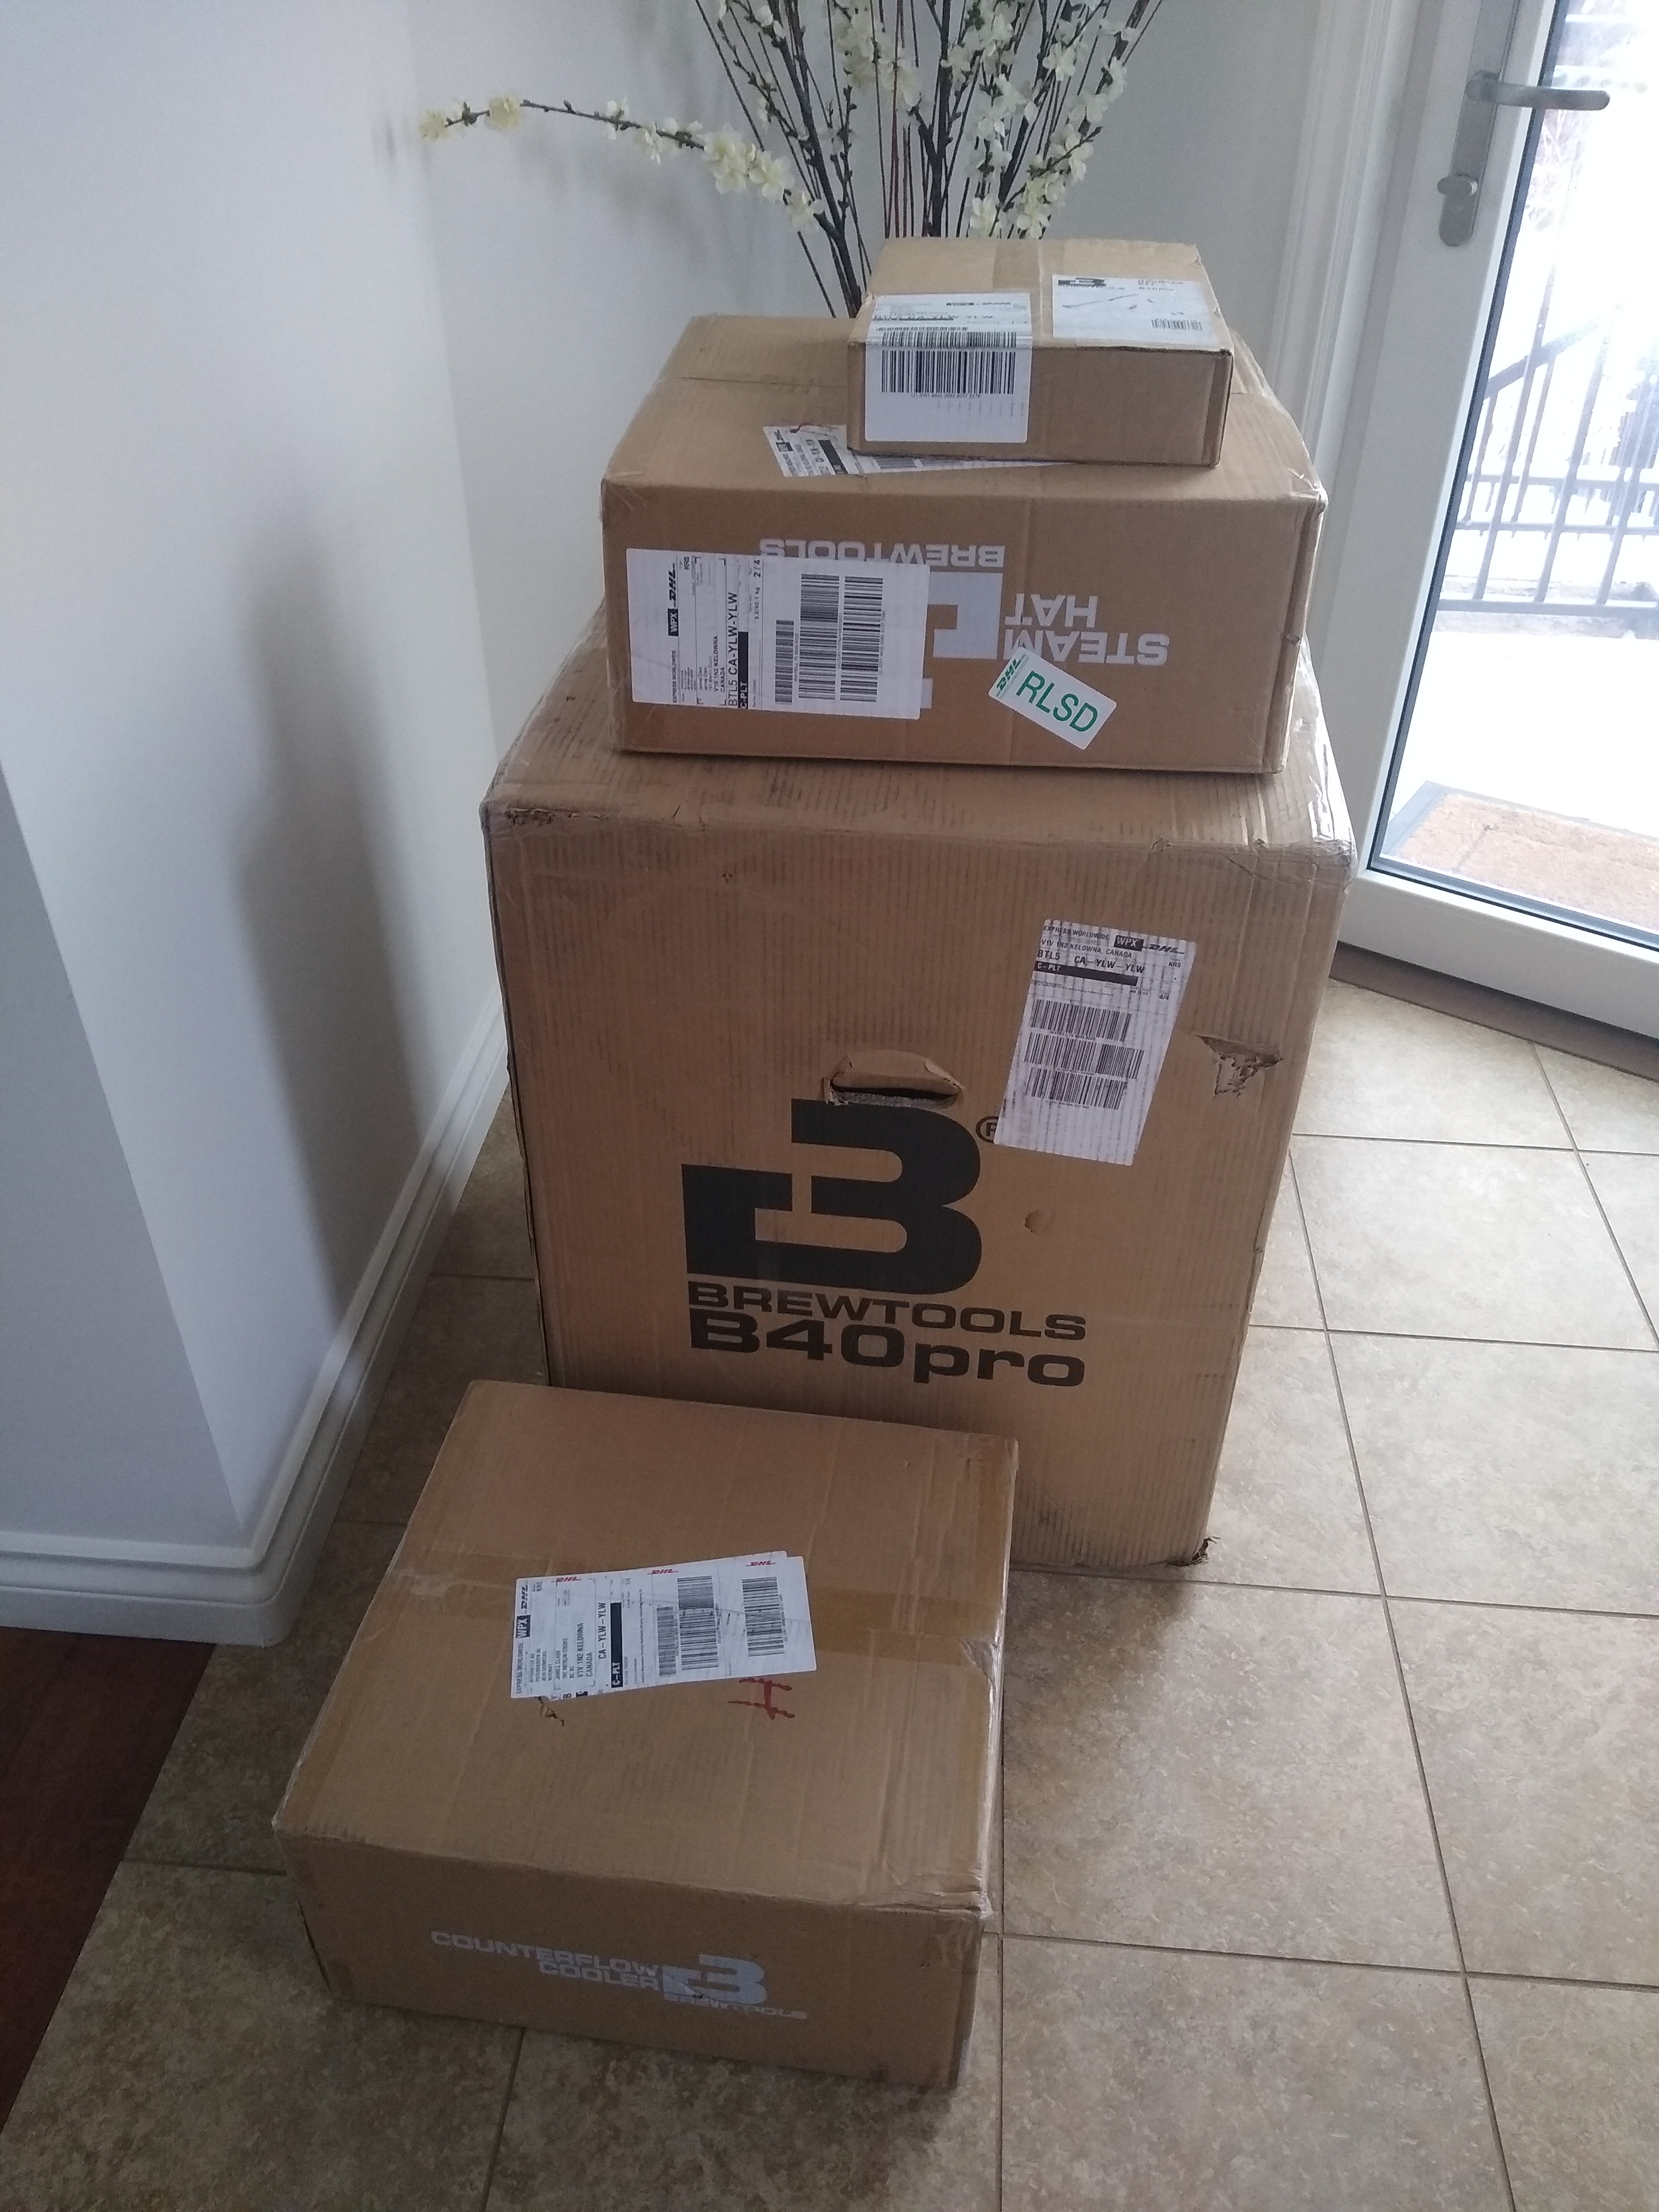
After doing some research and looking to see how my brewing process, plus my location, matched with an integrated brew system, I decided to go with the Brewtools B40 — their smallest (40L) integrated system. It looked like the right match for my location/process. Having cleared customs here in Canada it came nicely packaged to the house.
Brewtools B40 Pro Brewing System
My wife and I agreed that it should be set up in our basement shop — it is an electric kettle system. My major goal with this system, besides to brew great beers, was to reduce the amount of heavy lifting involved. I found lifting 40-50 lbs of near-boiling water was probably not in my best interest.
Before I could get my brewery up and running, I had to have a little work done. I had a 240V isolated circuit installed to plug into directly — 30A worked nicely — no popped fuses! Next, I searched around for a rolling table to use with it–one low enough to see into the kettle. After much searching the folks over at Okanagan Stainless were kind enough to build me a fantastic Stainless Steel table — perfect for my need! They do such awesome work!
Here’s a look at the table. You can see the swing-arm installed–I’ll show how that works in a follow-on photo.
As a side diversion (lol), I tried to 3d print a block-and-tackle pulley system to use with my swing-arm (see photo). Although it worked, I needed something a little smaller.
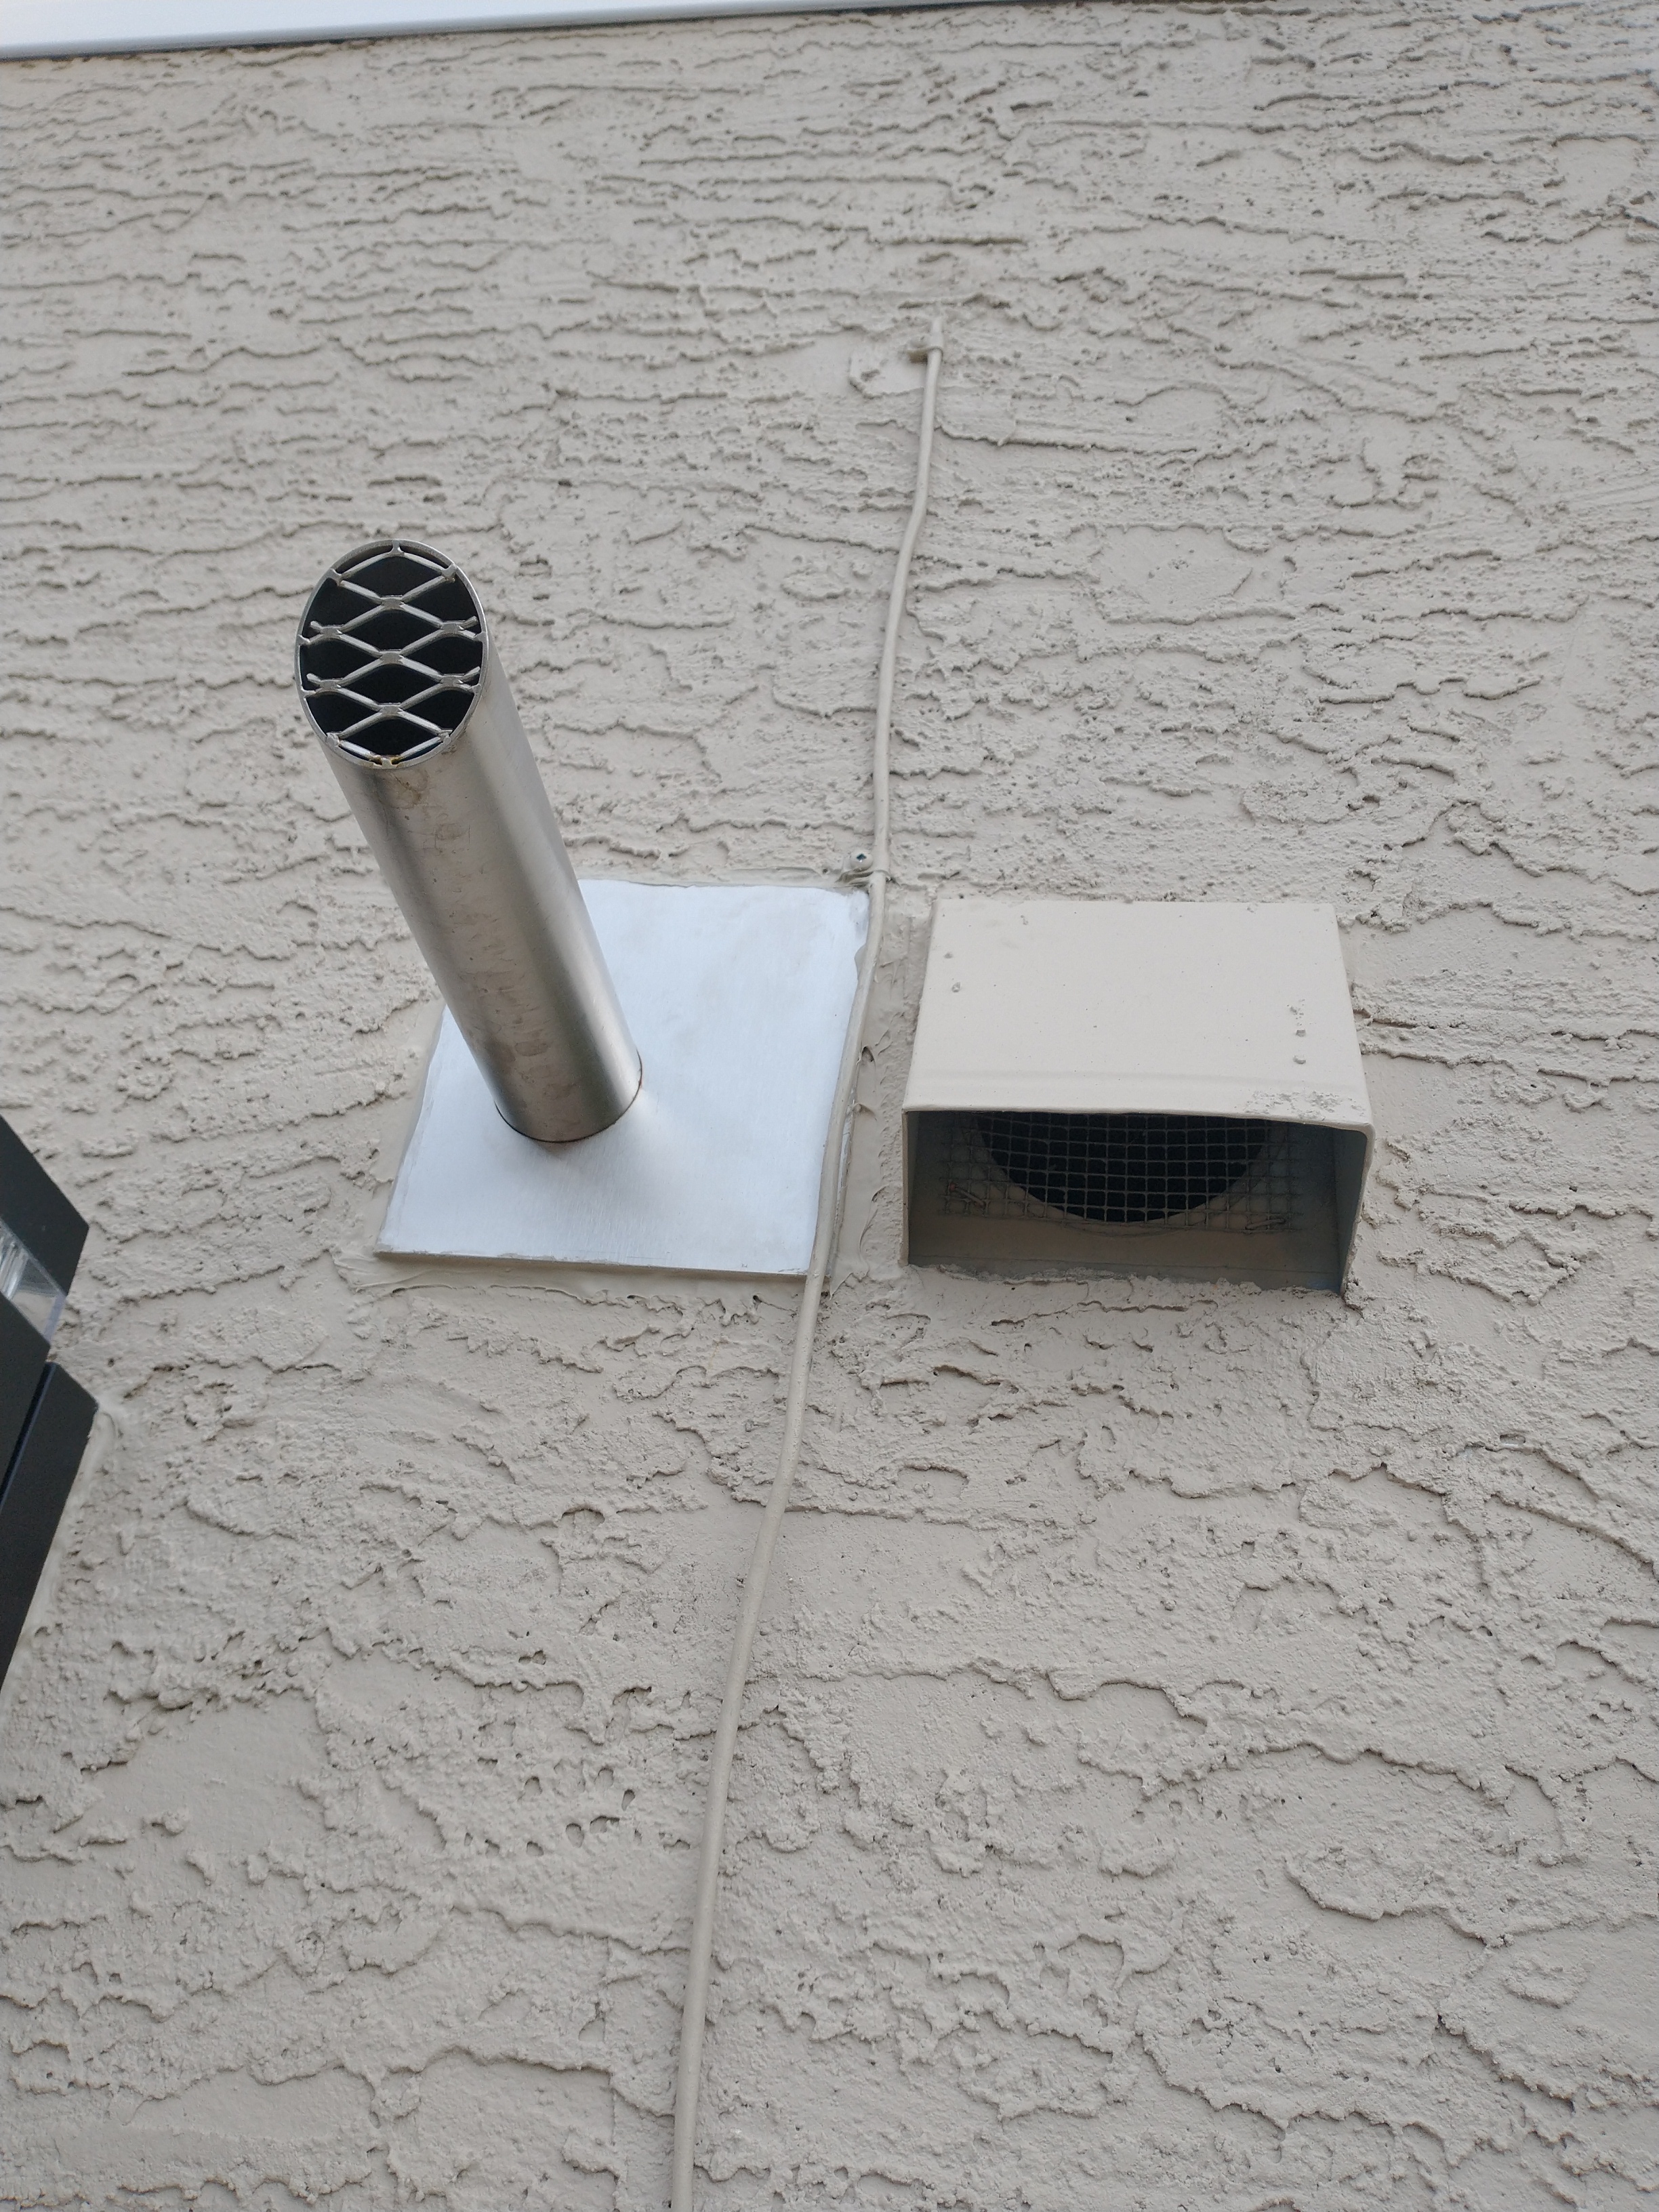
With my table and power ready, the final piece of the puzzle was venting the steam out of the “Brewery.” Fortunately, I had two extraneous vent pipes leading out of the house from the old furnace — I decided to attempt to use one of those in the process. I drew up my design and bought the pieces/parts to see if I could make it work.
We set up the system (here you can see the initial layout) and tried boiling some water to see if it would work — come to find out, the exhaust pipe was a cardboard tube. haha. That wasn’t going to work! So I replaced that with a standard exhaust pipe — still not a good seal — too much leaking. I needed another solution — back to the Okanagan Stainless guys! They built me a stainless steel exhaust system to use … here are a few photos of the installed product.
With everything in place, I was ready to test out the system! I ran through about 3 test batches (water only) to understand the best way to attach all the valves. I purchased a few extra valves, the steam hat, and the wort chiller to have a complete solution. Here’s how the system looks set up when I’m brewing a batch of beer …
Overall, I love my system — however, I’m having issues with my brewhouse efficiency — I’m hovering at around 60% for mash conversion — that’s after 4 full batches. Fortunately, the beers still finished in style and are tasting great, but I want an efficiency closer to 80%. Still more research to do. In one of my follow-on posts I’ll talk through my process (I just brewed a Trappist-style Dark Strong Ale) — maybe someone will have some ideas.
I already have a few “upgrades/enhancements” planned for the brewery to make it even easier and more efficient to use. Oh, here’s an updated picture of my steam exhaust … I wanted to show the finished product there as well!